Select a checkout option below
Your cart is currently empty.
Continue shopping
Content Menu
● Understanding the Importance of Reception Desk Framing
● H2: Planning Your Reception Desk Frame
>> H3: Assessing Space and Requirements
>> H3: Sketching the Design
>> H3: Choosing Materials
● H2: Tools and Materials Needed
>> H3: Essential Tools
>> H3: Materials Checklist
● H2: Step-by-Step Guide to Framing a Reception Desk
>> H3: Step 1 – Measuring and Marking
>> H3: Step 2 – Building the Base Frame
>> H3: Step 3 – Erecting the Vertical Supports
>> H3: Step 4 – Framing the Countertop and Transaction Ledge
>> H3: Step 5 – Adding Storage and Features
>> H3: Step 6 – Sheathing and Finishing
>> H3: Step 7 – Final Assembly and Inspection
● H2: Design Tips for Framing a Reception Desk
>> H3: Ergonomics and Accessibility
>> H3: Aesthetic Considerations
>> H3: Durability and Maintenance
● H2: Common Mistakes to Avoid
>> H3: Inaccurate Measurements
>> H3: Insufficient Support
>> H3: Ignoring Cable Management
>> H3: Overlooking Accessibility
● H2: Customization Ideas
>> H3: Modular Components
>> H3: Integrated Technology
>> H3: Unique Shapes and Materials
● H2: Maintenance and Upkeep
● H2: Frequently Asked Questions
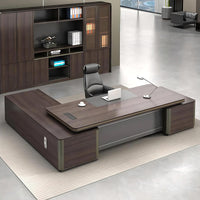
A reception desk is the focal point of any office lobby, setting the tone for first impressions and shaping the experience of visitors, clients, and staff. Framing a reception desk involves more than just building a sturdy structure—it requires thoughtful planning, material selection, ergonomic considerations, and design aesthetics. In this comprehensive guide, we will walk through the process of framing a reception desk from conceptualization to completion, providing step-by-step instructions, design tips, and practical advice for both DIY enthusiasts and professionals.

A well-framed reception desk is crucial for the following reasons:
- Structural Integrity: The frame is the skeleton of the desk, supporting the countertop, panels, and any equipment placed on or within the desk.
- Aesthetics: The frame determines the desk's shape, size, and style, influencing the overall look of the reception area.
- Functionality: Proper framing ensures the desk is ergonomic, accessible, and equipped with features such as storage, cable management, and accessibility for people with disabilities.
- Durability: A strong frame extends the lifespan of the desk, reducing maintenance and replacement costs.
Before starting any construction, assess the available space and list the requirements for your reception desk. Consider:
- The dimensions of your lobby or reception area.
- The number of people who will use the desk simultaneously.
- Storage needs (drawers, cabinets, shelves).
- Integration of technology (computers, telephones, printers).
- Accessibility for visitors and staff, including ADA compliance.
Once you have your requirements, sketch a preliminary design. This should include:
- The shape (straight, L-shaped, U-shaped, curved).
- Dimensions (length, width, height).
- Placement of features (countertop, transaction ledge, storage units).
- Openings for wiring and cable management.
Select materials based on durability, aesthetics, and budget. Common framing materials include:
- Wood: Plywood, solid wood, and engineered wood are popular for their workability and strength.
- Metal: Steel or aluminum frames offer durability and a modern look.
- Composite Materials: These can provide cost-effective solutions with good structural properties.
Consider the finish materials (laminates, veneers, glass) that will be applied over the frame.
To frame a reception desk, you will typically need:
- Measuring tape and square
- Circular saw or table saw
- Power drill and bits
- Screwdrivers
- Clamps
- Level
- Hammer and nails or nail gun
- Wood glue or construction adhesive
- Safety gear (gloves, goggles, ear protection)
- Framing lumber or metal studs
- Plywood or MDF panels
- Screws, bolts, and fasteners
- Brackets and corner braces
- Countertop material
- Finishing materials (paint, stain, laminate, veneer)
Begin by measuring the designated area for the desk. Mark the outline of the desk on the floor using chalk or masking tape. Double-check all measurements to ensure accuracy.
The base frame provides foundational support. To build it:
- Cut framing lumber or metal studs to the required lengths for the base.
- Assemble a rectangular or shaped frame on the floor, securing corners with screws or brackets.
- Add cross supports at intervals to prevent sagging and increase stability.
- Use a level to ensure the base is perfectly horizontal.
Attach vertical supports to the base at each corner and at intervals along the length. These will support the countertop and any upper structures.
- Ensure each vertical support is plumb (perfectly vertical).
- Secure with screws or bolts.
- For added strength, use corner braces or metal brackets.
The countertop is where most interactions occur. Frame it as follows:
- Attach horizontal supports at the desired height for the countertop.
- If including a transaction ledge (higher counter for standing visitors), frame it above the main counter.
- Ensure all surfaces are level and securely fastened.
Frame in areas for drawers, cabinets, and shelves as per your design. Use additional supports and panels to create enclosed spaces.
- Plan for cable management by leaving openings or installing grommets.
- Consider integrating lockable storage for security.
Once the frame is complete:
- Attach plywood, MDF, or other sheathing panels to the frame using screws or adhesive.
- Sand all surfaces smooth.
- Apply finishing materials such as laminate, veneer, or paint.
- Install the countertop, ensuring it is securely attached and finished to your specifications.
- Attach any hardware (drawer pulls, cabinet handles).
- Install electrical outlets, cable management systems, and lighting if needed.
- Inspect the finished desk for stability, alignment, and finish quality.

- Ensure the desk height is comfortable for both seated staff and standing visitors.
- Provide knee clearance for staff and wheelchair users.
- Place frequently used items within easy reach.
- Match the desk's style and color to the office décor.
- Incorporate branding elements, such as logos or company colors.
- Use lighting to highlight the desk and create a welcoming atmosphere.
- Choose materials that are easy to clean and resistant to wear.
- Use high-quality hardware for drawers and doors.
- Plan for easy access to wiring and equipment for maintenance.
Even small errors in measurement can lead to misaligned components and poor fit. Always double-check measurements before cutting materials.
Neglecting to add enough supports can result in a wobbly or sagging desk. Use adequate cross-bracing and secure all joints properly.
Failing to plan for cables and wiring can lead to clutter and safety hazards. Integrate cable channels and access points during framing.
Ensure the desk meets accessibility standards, including appropriate counter heights and knee clearance for wheelchair users.
Design the desk with modular sections that can be reconfigured or expanded as needs change.
Frame in spaces for built-in monitors, charging stations, and other tech features.
Experiment with curved or angled frames, or use mixed materials for a distinctive look.
- Regularly inspect the frame for signs of wear or damage.
- Tighten any loose screws or hardware.
- Clean surfaces with appropriate products to maintain appearance and hygiene.
- Address any issues promptly to prevent further damage.
Q1: What is the best material for framing a reception desk?
A: Wood is commonly used for its versatility and ease of use, but metal frames offer greater durability and a modern aesthetic. The choice depends on your design preferences, budget, and intended use.
Q2: How high should a reception desk be?
A: The standard height for a reception desk countertop is 28–30 inches for seated staff and 42–46 inches for a transaction ledge for standing visitors.
Q3: How can I make my reception desk ADA compliant?
A: Ensure there is a section of the desk with a height no greater than 36 inches, provide at least 27 inches of knee clearance, and ensure the area is accessible to wheelchair users.
Q4: What tools do I need to frame a reception desk?
A: Essential tools include a measuring tape, saw, drill, screwdriver, clamps, level, and safety gear. Additional tools may be required depending on your design and materials.
Q5: Can I frame a reception desk myself, or should I hire a professional?
A: If you have basic carpentry skills and the necessary tools, you can frame a simple reception desk yourself. For complex designs or large-scale projects, hiring a professional is recommended.
---
Hot Tags: China, Global, OEM, private label, manufacturers, factory, suppliers, manufacturing company

Leather Executive Office Chair with Genuine Leather, Solid Wood & Lumbar Support

Mesh Ergonomic Office Chair with Breathable Mesh & Lumbar Support for Executive Office
Bookcase Storage Cabinet 71 in Tall for Home Office
Curved Reception Desk 47-94 in Wide with Keyboard Tray, File Drawers & LED Lighting
Curved Reception Desk 63-142 in Wide with Keyboard Tray, File Drawers & Fluted Front
Curved Reception Desk 47-150 in Wide with LED Lighting, Keyboard Tray & File Drawers

Ergonomic Office Chair with Swivel, Curved & Dual-Tone for Home Office

Modern Executive Desk with Wireless Charging, Built-In Outlets & Side Storage

Modern Executive Desk 25-110 in Wide with Side Storage for Home Office
Modern Executive Desk 22-126 in Wide with Curved & Cable Management for Home Office

Content Menu ● Introduction ● Understanding the Role of a Reception Desk Facade >> Importance of the Reception Desk Facade >> Functions of the Facade ● Planning Your Reception Desk Facade >> Assessing Space and Workflow...
May 25, 2025
Content Menu ● Introduction ● Understanding the Role of the Reception Desk >> The Reception Desk as a Brand Ambassador >> Functional Center of the Reception Area ● Key Factors to Consider When Choosing a...
May 25, 2025
Content Menu ● Introduction ● Understanding Reception Desk Design >> Why Build Your Own Reception Desk? >> Types of Reception Desks ● Planning Your Reception Desk >> Assessing Your Space >> Defining Functional Needs >> Choosing Materials >> Designing...
May 22, 2025