Select a checkout option below
Your cart is currently empty.
Continue shopping
Content Menu
● Introduction
● Understanding Reception Desk Design
>> Why Build Your Own Reception Desk?
>> Types of Reception Desks
● Planning Your Reception Desk
>> Assessing Your Space
>> Defining Functional Needs
>> Choosing Materials
>> Designing the Desk
● Gathering Tools and Materials
>> Essential Tools
>> Materials Checklist
● Step-by-Step Construction Guide
>> Step 1: Building the Frame
>> Step 2: Attaching Panels and Surfaces
>> Step 3: Adding Storage and Features
>> Step 4: Sanding and Finishing
>> Step 5: Assembly and Installation
● Customization and Branding
>> Incorporating Your Brand Identity
>> Eco-Friendly Options
● Safety and Ergonomics
>> Ensuring Stability and Safety
>> Ergonomic Considerations
● Maintenance and Longevity
>> Protecting Your Desk
>> Upgrading Over Time
● Common Challenges and Solutions
>> Dealing with Limited Space
>> Managing Cables and Clutter
>> Accommodating Multiple Staff
● Frequently Asked Questions
A reception desk is the centerpiece of any office lobby, hotel, or clinic, serving as both a functional workspace and a statement of your brand's identity. Building your own reception desk allows you to customize its size, appearance, and features to perfectly match your space and needs. This comprehensive guide will walk you through every step of designing and constructing a reception desk, from initial planning to final installation. Whether you're a DIY enthusiast or a business owner looking to save costs and add a personal touch, this article will provide practical advice, detailed instructions, and expert tips to ensure your project is a success.

Building your own reception desk offers several advantages:
- Customization: Tailor the desk to your space, workflow, and branding.
- Cost Savings: DIY construction can be more affordable than purchasing a custom-made desk.
- Quality Control: Select materials and finishes that meet your standards.
- Sense of Accomplishment: Enjoy the satisfaction of creating a functional piece of furniture yourself.
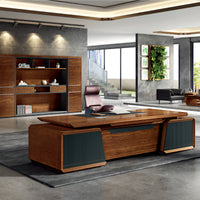
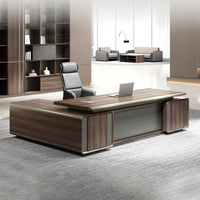
Before you begin, consider the different types of reception desks:
- Straight desks: Simple and space-efficient, suitable for small lobbies.
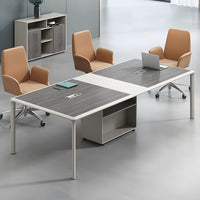
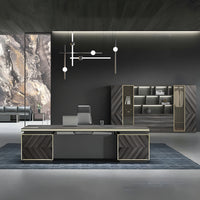
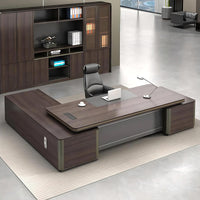
- L-shaped desks: Provide more workspace and privacy for the receptionist.
- U-shaped desks: Offer maximum surface area and storage, ideal for busy reception areas.
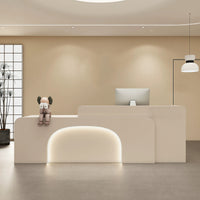
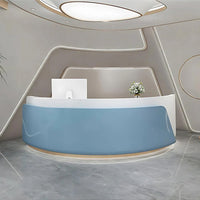
- Curved or circular desks: Make a bold visual statement and facilitate interaction from multiple angles.
Choose a style that fits your space and functional requirements.
Begin by measuring the area where the desk will be placed. Consider:
- The available floor space
- The flow of foot traffic
- Proximity to electrical outlets and network connections
- Visibility from the entrance
Sketch a floor plan to visualize how the desk will fit into your reception area.
Identify the primary functions your desk must serve:
- Greeting and checking in visitors
- Storing office supplies and documents
- Housing computers, phones, and other equipment
- Providing privacy for sensitive tasks
List your must-have features, such as lockable drawers, cable management grommets, or ADA-compliant access.
Common materials for reception desks include:
- Wood (solid, plywood, MDF)
- Laminate or veneer surfaces
- Metal frames or accents
- Glass panels for a modern look
Select materials that balance aesthetics, durability, and budget. For high-traffic areas, opt for scratch-resistant surfaces and sturdy construction.
Draft a detailed design or blueprint. Consider:
- Desk height (typically 28–30 inches for writing surfaces, 40–42 inches for transaction counters)
- Depth and width to accommodate equipment and paperwork
- Storage options: drawers, cabinets, open shelves
- Accessibility for both staff and visitors
Use design software or graph paper to create scale drawings. If you're new to furniture design, look for inspiration from online galleries or office furniture catalogs.
You'll need basic woodworking and assembly tools, such as:
- Tape measure
- Carpenter's square
- Circular saw or table saw
- Power drill and bits
- Screwdrivers
- Clamps
- Sander or sandpaper
- Level
Depending on your design, gather:
- Wood panels (plywood, MDF, or solid wood)
- 2x4 or 2x2 lumber for framing
- Wood screws and fasteners
- Wood glue
- Finishing materials (paint, stain, varnish)
- Drawer slides, cabinet hinges, or locks
- Cable management grommets
- Decorative trim or edging
Purchase a little extra material to allow for mistakes or adjustments.
The frame is the backbone of your desk, providing stability and support.
1. Cut the framing lumber to size according to your design.
2. Assemble the base frame using wood screws and glue, ensuring all corners are square.
3. Add vertical supports and cross-bracing for additional strength.
4. Check for levelness and adjust as needed.
With the frame complete, attach the desk's visible surfaces:
1. Cut wood panels for the desktop, front, and sides.
2. Secure the panels to the frame using screws, nails, or construction adhesive.
3. For a two-level desk, attach the transaction counter at the appropriate height.
4. Fill any screw holes with wood filler and sand smooth.
Incorporate storage and functional elements:
1. Build and install drawers or cabinets as specified in your design.
2. Attach drawer slides and cabinet doors, ensuring smooth operation.
3. Install cable management grommets or cutouts for wires.
4. Add privacy panels or modesty screens if desired.
A smooth, professional finish enhances both appearance and durability.
1. Sand all surfaces with progressively finer grit sandpaper.
2. Wipe away dust with a tack cloth.
3. Apply your chosen finish—paint, stain, or clear varnish—following the manufacturer's instructions.
4. Allow sufficient drying time between coats.
Move the completed desk into position:
1. Assemble any modular sections onsite if the desk is too large to move in one piece.
2. Level the desk using adjustable feet or shims.
3. Secure the desk to the floor or wall if necessary for safety.
4. Connect electrical and network cables, using cable covers to keep them tidy.
A reception desk is often the first thing visitors see. Personalize it by:
- Adding your company logo with vinyl decals or engraved plaques
- Using brand colors in paint or laminate finishes
- Incorporating accent lighting for a modern touch
Consider sustainable materials and finishes:
- FSC-certified wood or bamboo
- Low-VOC paints and stains
- Recycled metal or glass components
These choices reflect a commitment to environmental responsibility and can enhance your brand image.
- Use sturdy joinery and quality fasteners.
- Avoid sharp corners—round edges or use protective trim.
- Ensure the desk is stable and won't tip over.
- Set keyboard and writing surfaces at a comfortable height.
- Provide adequate legroom for the receptionist.
- Position monitors to reduce glare and neck strain.
- Use coasters and desk mats to prevent scratches and stains.
- Regularly check and tighten fasteners.
- Clean surfaces with appropriate cleaners for the material.
As your business grows, you may want to:
- Add modular extensions or more storage
- Refinish or repaint the desk for a fresh look
- Upgrade hardware for improved security or functionality
- Opt for a compact, straight desk with built-in storage.
- Use vertical shelving to maximize storage without increasing the footprint.
- Plan cable routes in advance and install grommets or channels.
- Use cable trays or clips to keep wires organized and out of sight.
- Design a larger, multi-user desk with separate workstations.
- Provide privacy panels or dividers as needed.
Q1: What is the ideal height for a reception desk?
A: The writing surface should be 28–30 inches high, while the transaction counter is typically 40–42 inches high to accommodate standing visitors.
Q2: Can I build a reception desk with basic DIY skills?
A: Yes, with careful planning and basic woodworking tools, most people can build a simple reception desk. More complex designs may require advanced skills.
Q3: What materials are best for a durable reception desk?
A: Plywood, MDF, or solid wood with a laminate or veneer finish are popular choices for durability and appearance. Metal frames add extra strength.
Q4: How do I make my reception desk ADA-compliant?
A: Ensure there is a section of the desk no higher than 36 inches and at least 30 inches wide for wheelchair access.
Q5: How long does it take to build a reception desk?
A: Simple desks can be completed in a weekend, while larger or more intricate designs may take several days to a week, depending on your experience and available time.

---
Hot Tags: China, Global, OEM, private label, manufacturers, factory, suppliers, manufacturing company
Aluminum Alloy Frame Stylish Conference Table with Cable Hole and Wood Grain Finish HYZ-10109
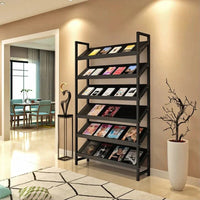
Angled Floor-Standing Bookshelf with Storage for Display Racks and Magazines ZZJ-008
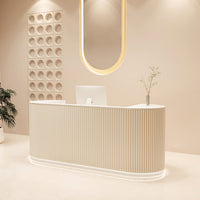
Arc-Edge Straight Reception Desk with Keyboard Tray, Cabinets, and Drawers for Salons JDT-1056
Atmospheric supervisor desk manager desk supervisor desk simple modern Taipan table LBZ-10122

Back and Relax Lift Swivel Chair for Ultimate Comfort BGY-1055
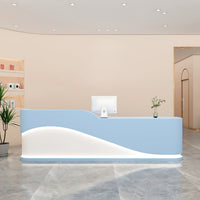
Baking Paint Curved Cashier Reception Front Counter JDT-7146


Boss Computer Executive Desk Supervisor Wireless Charging New Element Design LBZ-1016

Boss Desk And Chair Set Office Single Manager Supervisor Desk Company Desk LBZ-785
Boss desk simple modern president Manager Boss Desk LBZ-10166
Boss desk Walnut Color Boss Desk president manager desk simple modern LBZ-10149
Boss Desk With Double-Sided Design simple modern large desk office furniture LBZ-10113

Content Menu ● Introduction ● Why the Cashier Counter Table Matters in Retail >> The Central Role of the Cashier Counter Table >> Functions Beyond Transactions ● Types of Cashier...
May 11, 2025
Content Menu ● Understanding the Role of a Salon Reception Desk ● Planning Your Salon Reception Desk >> Assessing Your Needs and Space >> Setting a Budget >> Choosing a Style and Design >> Selecting the...
May 22, 2025
Content Menu ● Why Choose Reclaimed Wood? >> Environmental Benefits >> Unique Aesthetic >> Durability ● Planning Your Reception Desk >> Assess Your Space and Needs >> Gathering Tools and Materials >>> Essential Tools >>> Materials ● Sourcing and Preparing...
May 21, 2025