DIY Cashier Counter: The Ultimate Guide to Custom-Made Checkout Solutions for Your Business
kaguyasuContent Menu
● Introduction to DIY Cashier Counter
● Why Choose a DIY Cashier Counter?
>> H2: Benefits of a DIY Cashier Counter
● Key Considerations When Planning Your DIY Cashier Counter
>> H2: Design and Layout
>> H3: Materials Selection
● Step-by-Step Guide to Building a DIY Cashier Counter
>> H2: Tools and Materials Needed
>> H3: Construction Process
● Enhancing Your DIY Cashier Counter
>> H2: Additional Features to Consider
● OEM Services for DIY Cashier Counters: Why Partner with a Chinese Factory?
>> H2: Advantages of OEM Cooperation
● Frequently Asked Questions about DIY Cashier Counters
>> H2: Q&A Section
Introduction to DIY Cashier Counter
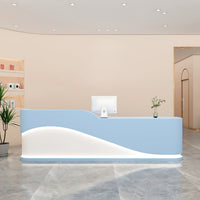
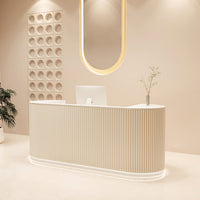
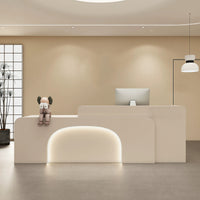
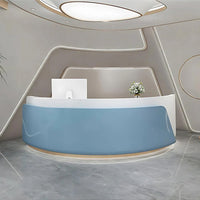
In today's retail environment, a well-designed cashier counter is more than just a place to process transactions—it's a key element of your store's branding, customer experience, and operational efficiency. For businesses looking to stand out, a DIY cashier counter offers the flexibility to customize design, functionality, and size according to specific needs. This article explores the benefits, design tips, materials, and step-by-step guidance on creating your own DIY cashier counter. Whether you are a brand owner, wholesaler, or manufacturer seeking OEM services, understanding the DIY approach can inspire innovative solutions tailored to your market.

Why Choose a DIY Cashier Counter?
H2: Benefits of a DIY Cashier Counter
- Customization: DIY cashier counters allow you to tailor every detail—from dimensions to materials and finishes—to perfectly fit your store layout and brand identity.
- Cost-Efficiency: Building your own counter or working with a custom OEM factory can reduce costs compared to off-the-shelf options.
- Functionality: You can design compartments, shelves, and cable management systems that optimize workflow and improve cashier productivity.
- Durability: Selecting high-quality materials ensures longevity, especially important for busy retail environments.
- Branding Opportunities: Unique designs and finishes help reinforce your brand's image and create a memorable customer experience.
Key Considerations When Planning Your DIY Cashier Counter
H2: Design and Layout
- Space Measurement: Accurate measurement of the available space ensures the counter fits well without obstructing customer flow.
- Ergonomics: Design for cashier comfort with appropriate height and legroom.
- Customer Interaction: Consider the counter's height and shape to facilitate easy communication and transaction.
- Storage Needs: Plan for drawers, shelves, and compartments to store cash registers, bags, and other essentials.
- Technology Integration: Allocate space for POS systems, barcode scanners, and cable management.
H3: Materials Selection
- Wood: Popular for its durability and aesthetic appeal; plywood, MDF, and veneered boards are common choices.
- Metal: Provides strength and modern look; often used for frames or accents.
- Laminate and Veneer: Offer easy cleaning and a variety of finishes.
- Eco-Friendly Options: Water-based paints and primers reduce environmental impact.
Step-by-Step Guide to Building a DIY Cashier Counter
H2: Tools and Materials Needed
- Pinewood or plywood boards
- Screws, nails, and wood glue
- Router and jigsaw
- Sandpaper and putty
- Paints and primers (preferably water-based)
- Measuring tape and square tool
- Screwdriver and drill
H3: Construction Process
1. Cutting Wood Pieces: Begin by cutting all pinewood or plywood pieces to the required lengths and widths.
2. Assembling the Base: Assemble the base frame ensuring all parts are square and secure with screws.
3. Creating Raised Panels: Use a router to make slots for raised panels, then fit matchboards or plywood into these slots.
4. Sanding and Filling: Sand all surfaces thoroughly and fill screw holes with putty for a smooth finish.
5. Attaching Panels: Secure panels to the frame and reinforce with screws.
6. Countertop Preparation: Cut and round the edges of the countertop board, sanding it smooth.
7. Painting: Apply ecological water-based primer followed by premium quality enamel paint.
8. Final Assembly: Attach all parts, ensuring stability and finishing touches.
This process mirrors professional OEM production lines while allowing customization for your unique needs[1][2].
Enhancing Your DIY Cashier Counter
H2: Additional Features to Consider
- Modular Design: Build the counter in sections for easy transport and installation.
- Cable Management: Integrate channels or holes to neatly route cables.
- Security Features: Lockable drawers and compartments for cash and valuables.
- Customer Convenience: Add shelves or hooks for bags and personal items.
- Branding Elements: Incorporate logos, colors, and signage directly into the counter design.
OEM Services for DIY Cashier Counters: Why Partner with a Chinese Factory?
H2: Advantages of OEM Cooperation
- Expertise: Factories specializing in custom cashier counters have the technical skills and machinery to produce high-quality products.
- Customization: OEM providers offer tailored designs that meet specific brand and functional requirements.
- Cost Savings: Leveraging economies of scale and efficient production reduces costs.
- Quality Control: Established factories maintain strict quality standards and certifications.
- Timely Delivery: Professional management ensures on-time production and shipping.
Partnering with a Chinese OEM factory can bring your DIY cashier counter ideas to life with professional craftsmanship and competitive pricing[9].
Frequently Asked Questions about DIY Cashier Counters
H2: Q&A Section
Q1: What materials are best for a durable DIY cashier counter?
A1: High-quality plywood or MDF with a veneered or laminate finish is durable and cost-effective. Metal frames can add strength and modern aesthetics.
Q2: How can I incorporate technology into my DIY cashier counter?
A2: Design compartments for POS systems and include cable management holes or channels to keep wires organized and out of sight.
Q3: Can I customize the size of my DIY cashier counter?
A3: Yes, one of the main benefits of DIY counters is the ability to tailor dimensions to your specific space and needs.
Q4: How do I ensure the counter is ergonomic for cashiers?
A4: Standard countertop height is around 36-42 inches; ensure sufficient legroom and consider adjustable elements if possible.
Q5: Is it cost-effective to build a DIY cashier counter versus buying pre-made?
A5: DIY or OEM custom counters often reduce costs by eliminating middlemen and allowing material and design choices that fit your budget.

[1] https://www.instructables.com/Building-Custom-Shop-Counters-Cash-Wraps/
[2] https://www.youtube.com/watch?v=vHXw6QEVeI4
[3] https://www.youtube.com/watch?v=pzeH2M05meM
[4] https://www.youtube.com/watch?v=2FQiMaY5jM0
[5] https://www.nurturingfamilyandself.com/how-to-build-a-grocery-store-checkout-counter-for-less-than-20/
[6] http://www.surfeon.net/mybbs/topic.asp?id=879
[7] https://www.youtube.com/watch?v=Gnxmn7CmupE
[8] https://huggingface.co/openbmb/cpm-bee-1b/commit/bd72a61dd7a59086ed7456f1dfcaa995c8ec58a3.diff
[9] work.retail_equipment_manufacturing
Hot Tags: China, Global, OEM, private label, manufacturers, factory, suppliers, manufacturing company


