Select a checkout option below
Your cart is currently empty.
Continue shopping
Content Menu
● Planning and Design: Laying the Foundation for Success
>> Measuring the Space
>> Choosing a Design
>> Selecting Materials
● Tools and Materials: Equipping Your Workshop
>> Essential Tools
>> Key Materials
● Constructing the Frame: Building the Skeleton
>> Cutting the Boards
>> Assembling the Base
>> Adding Vertical Supports
>> Installing Cross Beams
>> Creating the Curved Form
● Curving the Top: Achieving the Desired Shape
>> Bending the Plywood
>> Laminating or Veneering
>> Alternative Techniques
● Adding a Finish: Enhancing the Appearance and Durability
>> Painting
>> Staining
>> Sealing
● Challenges and Solutions: Overcoming Obstacles
>> Bending Wood
>> Securing Curved Panels
>> Achieving a Smooth Surface
● Incorporating Functionality: Adding Features That Enhance Usability
>> Storage Solutions
>> Technology Integration
>> Ergonomic Design
● Final Assembly and Installation: Bringing It All Together
>> Assembling the Frame
>> Attaching the Top
>> Installing Additional Features
● Maintenance and Upkeep: Preserving the Beauty
>> Cleaning
>> Protection
>> Repairs
● Curved Reception Desk: The Benefits
● Related Questions and Answers
● Citations:
As a China-based custom reception desk manufacturer specializing in OEM services for international brands, wholesalers, and other manufacturers, we understand the importance of a striking first impression. A curved reception desk can transform any space, adding a touch of elegance and modernity. This comprehensive guide will walk you through the process of creating a stunning curved reception desk, incorporating the keyword "how to make a curved reception desk" throughout to help you optimize your project.

Before diving into the construction, meticulous planning and design are crucial[2]. This phase involves assessing the space, defining the style, and selecting the appropriate materials.
Accurate measurements are the bedrock of any successful project[2]. Begin by determining the precise dimensions of the reception area, including length, width, and any potential obstacles such as doors or pillars[2]. This will dictate the maximum size and curvature of the desk.
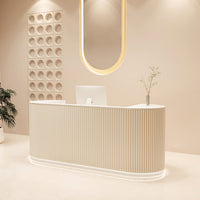
The design should align with the overall aesthetic of the space[2]. Options range from a full circle to an oval or a more free-form curve[2]. Consider the functionality required – will the desk accommodate multiple receptionists? Does it need to incorporate specific equipment or storage solutions?
Material choice impacts both the appearance and durability of the desk[4]. Plywood and Medium Density Fiberboard (MDF) are popular for their workability, while solid wood offers superior strength and aesthetics[3][2]. For the curved sections, thin, flexible plywood is ideal[2]. Other materials to consider include:
* Laminates and Veneers: For a polished finish and to mimic various wood grains or patterns[2].
* Natural Stone (Marble, Granite): To add a touch of luxury and sophistication[9].
* Engineered Stone (Quartz): Offering durability and a modern aesthetic[9].
* Metal: For an industrial look and added robustness[3].
Having the right tools and materials on hand will streamline the construction process[3]. Here's a comprehensive list:
1. Measuring Tape: For accurate measurements[3].
2. Handsaw or Circular Saw: For cutting wood to the required sizes[3].
3. Drill and Drill Bits: For making holes for screws[3].
4. Screwdriver: Manual or electric[3].
5. Sanding Block or Electric Sander: To smooth out wooden surfaces[3].
6. Clamps: For holding pieces together while the glue dries[3].
7. Paint Brushes and Rollers: For applying finishes[3].
8. Brad Nailer: To secure plywood[1].
9. Table Saw or Circular Saw: To cut the plywood[1].
1. Plywood or MDF Boards: For the main structure of the desk[3].
2. Thin Plywood (1/4 inch): For creating the curved sections[2].
3. Wood Glue: To secure pieces before screwing or nailing[3].
4. Screws and Nails: Different sizes for various parts of the desk[3].
5. Laminate or Veneer: For a polished finish[3].
6. Paint or Stain: Based on your desired finish[3].
7. Bondo: To fill any imperfections[6].
The frame provides the structural support for the curved reception desk[2]. This step requires precision and attention to detail.
Cut the plywood or MDF boards to the dimensions specified in your design[3]. Accurate measurements are paramount to ensure a seamless fit[3].
Lay out the base pieces on a flat surface and fasten them using wood screws and glue[3]. Ensure the base is square and level[3].
Attach vertical supports to the base to determine the height of the desk[3]. These supports will bear the weight of the desktop and any additional features.
Add cross beams between the vertical supports for extra support and stability[3]. These beams will reinforce the frame and prevent sagging.
For a curved design, create a form that the plywood or MDF can be bent around[2]. This can be achieved using a combination of straight and curved pieces of wood. Alternatively, consider using bending plywood, also known as "wiggle board," which is designed for creating curves[6].
The desktop is the most visible part of the reception desk, so it needs to be smooth, even, and perfectly curved[2].
Use thin (1/4 inch) plywood to create the curved top[2]. This flexible material can be bent around the frame you've constructed[2]. Apply wood glue and use brad nails to secure it in place[2]. Multiple layers of thin plywood may be necessary to achieve the desired thickness and rigidity.
Once the top is shaped, apply laminate or veneer to give it a finished look[2]. This will conceal the plywood layers and provide a durable, aesthetically pleasing surface.
* Kerf Cutting: Making a series of cuts on the back of a thicker board to allow it to bend[6].
* Steam Bending: Using steam to make the wood more pliable before bending.
* Bent Lamination: Gluing thin strips of wood together over a form to create a curved shape[2].
The finish you choose will depend on the style and durability you need[2]. Consider the following options:
If you desire a uniform color, paint is an excellent choice[2]. Apply a primer coat to prepare the surface, followed by several coats of your chosen paint color.
For a more natural look, stain the wood to enhance its grain and character[2]. Choose a stain color that complements the overall aesthetic of the space.
Apply a clear coat of sealant to protect the finish from scratches, stains, and moisture[2]. This will prolong the life of the desk and keep it looking its best.
Building a curved reception desk presents unique challenges. Here are some common issues and their solutions[2]:
Bending wood can be tricky[2]. Use steam bending or bent lamination techniques for more complex curves[2]. For simpler curves, thin plywood and a sturdy form will suffice.
When attaching curved panels, ensure that screws are placed in solid areas to avoid splitting the material[2]. Applying a small amount of white paint to the back of the panels can help identify the solid parts[2].
Uneven surfaces can be problematic when applying finishes. Use Bondo or a similar filler to smooth out any imperfections before sanding and painting or staining[6].
A reception desk is more than just a visual statement; it's a functional workspace. Consider incorporating the following features:
Integrate drawers, shelves, and cabinets to keep the reception area organized and clutter-free[4]. These storage spaces can house essential documents, office supplies, and personal items.
Accommodate computers, printers, and other technological devices by providing designated spaces and cable management solutions[4]. Ensure that power outlets and data ports are easily accessible.
Design the desk with ergonomics in mind to ensure the comfort and well-being of the receptionist[4]. Adjustable heights, ample workspace, and proper lighting are essential considerations.
Once all the components are ready, it's time to assemble and install your curved reception desk.
Use screws and wood glue to assemble the frame, ensuring it is sturdy and level[2]. Reinforce joints with corner brackets or metal plates for added strength[3].
Carefully place the curved top onto the frame and secure it with screws from underneath[2]. Ensure that the top is flush with the frame and that there are no gaps or uneven edges.
Install any cabinets, shelves, or other features according to your design[2]. Connect all necessary wiring and ensure that all components are functioning properly.

To keep your curved reception desk looking its best, regular maintenance is essential[2].
Use a damp cloth to wipe down the surface regularly[2]. Avoid harsh chemicals that could damage the finish[2].
Apply a protective coating to prevent scratches and spills from damaging the surface[2]. Use coasters and placemats to protect the desk from hot or wet items.
Address any minor damage promptly to prevent it from worsening. Scratches can be touched up with paint or stain, and loose screws can be tightened.
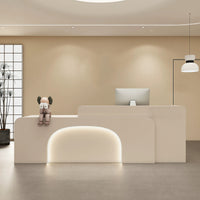
1. Enhanced Aesthetics: A curved reception desk adds a touch of elegance and modernity to any space[4].
2. Improved Interaction: The shape promotes better communication between receptionists and visitors[4].
3. Space Optimization: Curved desks can maximize space and improve flow, especially in smaller areas[4].
4. Customization: Curved reception desks can be tailored to fit specific branding and design needs[4].
5. Ergonomic Design: Many modern curved desks are designed for comfort and efficiency[4].
1. What are the best materials for a curved reception desk?
Plywood, MDF, solid wood, laminates, and veneers are all popular choices. Thin plywood is ideal for the curved sections, while solid wood offers superior strength and aesthetics[2][3].
2. How do I achieve a smooth curve on the desk top?
Use a combination of thin plywood and a curved form. Apply wood glue and secure with brad nails to ensure a smooth, even surface[2].
3. What design tools can I use to visualize my curved reception desk?
Software like SketchUp is excellent for creating detailed 3D models of your design, allowing you to visualize and adjust your project before construction[2].
4. How do I secure curved panels to the frame?
Use screws placed in solid areas of the frame to avoid splitting the material[2]. Applying a small amount of white paint to the back of the panels can help identify where the solid parts are[2].
5. How do I maintain my curved reception desk?
Clean regularly with a damp cloth and avoid harsh chemicals[2]. Apply a protective coating to prevent scratches and spills.
[1] http://handymanhow2.blogspot.com/2015/07/building-round-reception-desk.html
[2] https://kaguyasu.com/blogs/blog/how-to-build-a-curved-reception-desk
[3] https://kaguyasu.com/blogs/blog/how-to-build-a-reception-desk-step-by-step
[4] https://kaguyasu.com/blogs/blog/what-makes-a-curved-reception-front-desk-an-essential-element-for-modern-offices
[5] http://blog.modernofficefurniture.com/advantages-curved-reception-desk/
[6] https://www.finewoodworking.com/forum/curved-reception-desk
[7] https://btoffice.co.uk/curved-reception-desks-advantages-and-disadvantages/
[8] https://woodweb.com/knowledge_base/Building_a_Curved_Reception_Desk.html
[9] https://www.work-tops.com/a/expert/curved-reception-desk
[10] https://www.colintonfurniture.co.uk/how-to-design-a-reception-desk/
[11] https://learningcentre.officeinteriors.ca/blog/reception-desk-101
[12] https://www.woodsmithplans.com/plan/curved-front-desk/
[13] https://www.nationalofficefurnituresupplies.co.uk/curved-white-reception-desk-bundle
[14] https://www.pinterest.com/ideas/diy-curved-reception-desk/921964599776/
[15] https://www.youtube.com/shorts/8ydtEjDjSBw
[16] https://www.youtube.com/watch?v=n_p8hvp70hw
[17] https://www.youtube.com/watch?v=8ydtEjDjSBw
[18] https://www.tiktok.com/discover/curved-reception-desk-diy
[19] https://www.pinterest.com/pin/handyman-advice-tutorials-and-tips-for-the-everyday-diy-project--293930313175454625/
[20] https://www.youtube.com/watch?v=bSpDbUGWpCw
[21] https://www.pinterest.com/ideas/logo-on-reception-desk/908998300853/
[22] https://www.officereality.co.uk/blog/first-impressions-matter-choosing-the-perfect-reception-desk-for-your-space
[23] https://www.tiktok.com/discover/diy-reception-desk-on-a-budget
[24] https://blog.hubspot.com/marketing/presentation-topics
[25] https://www.pinterest.com/ideas/curved-reception-desk-design/910831985014/
[26] https://www.spaceist.co.uk/blog/5-stylish-reception-desk-ideas-more/
[27] https://www.contactmonkey.com/blog/employee-newsletter-ideas
[28] https://www.pinterest.com/BodrumCustomHomes/curved-desk/
[29] https://www.mauriziolacava.com/en/13-successful-presentation-hook-ideas/
[30] https://www.stonecontact.com/products-546055/curved-design-office-reception-desk
[31] https://www.channable.com/blog/google-shopping-title-optimization-best-practices
[32] https://kaguyasu.com/blogs/blog/how-to-build-a-reception-desk-1
[33] https://www.youtube.com/watch?v=vJhtWoSw0p0
[34] https://www.finewoodworking.com/project-guides/tables-and-desks/build-a-curved-front-desk
[35] https://uniquemobilier.com/en/how-to-choose-the-perfect-reception-desk/
[36] https://woodweb.com/knowledge_base/Building_a_Curved_Countertop_Reception_Desk.html
[37] https://www.auraadesign.co.uk/blog/office-reception-desk-buying-guide-how-to-choose-the-right-one/
[38] https://m2-retail.com/blogs/news/how-to-choose-the-right-reception-desk-in-eight-steps
[39] https://www.pureofficesolutions.co.uk/choosing-the-right-reception-desk/
[40] https://www.auraadesign.co.uk/blog/curved-reception-desks-is-it-for-your-office/
[41] https://www.calibre-furniture.co.uk/blog/the-pros-and-cons-of-curved-reception-desks
[42] https://sawmillcreek.org/showthread.php?235276-Reception-Desk-with-Curved-Front
[43] https://www.totalfitouts.com.au/blog/top-modern-reception-desk-design-trends-in-commercial-fitouts-insights-from-total-fitouts/
[44] https://www.youtube.com/watch?v=WHHJ2Uz-r3U
[45] https://coschedule.com/headlines/headline-formulas-and-templates
[46] https://www.auraadesign.co.uk/curved-reception-desks/
[47] https://www.canopyfitouts.com.au/blog/reception-desk-ideas/
[48] https://optinmonster.com/why-these-21-headlines-went-viral-and-how-you-can-copy-their-success/
[49] https://thearchitectsdiary.com/50-modern-reception-desks-design-inspiration-2024/
[50] https://www.studioforma.ca/office-reception-design-ideas/
[51] https://www.linkedin.com/pulse/reception-desk-crafting-impressions-every-space-graeme-bartholomew-cuske
[52] https://www.auraadesign.co.uk/blog/top-10-modern-reception-desks/
[53] https://www.sawstop.com/wp-content/uploads/2023/08/Curved-Office-Desk-Rev.pdf
[54] https://www.instructables.com/Retro-Reception-Desk/
Curved Reception Desk 47-150 in Wide with LED Lighting, Keyboard Tray & File Drawers
Curved Reception Desk 63-142 in Wide with Keyboard Tray, File Drawers & Fluted Front

L-Shaped Reception Desk with LED Lighting, Lumbar Support & Transaction Counter for Retail

Curved Reception Desk with Dual-Tone, Keyboard Tray & Lockable for Office Lobby

Curved Reception Desk 39-181 in Wide with Dual-Tone, Lockable & File Drawers for Retail

Modern Reception Desk with Dual-Tone, Solid Wood & File Drawers for Office Lobby

Salon Reception Desk 71-118 in Wide with Dual-Tone, Keyboard Tray & Lockable for Salon

L-Shaped Reception Desk 55-126 in Wide with Dual-Tone, Keyboard Tray & Lumbar Support

L-Shaped Reception Desk 39-236 in Wide with Dual-Tone, Keyboard Tray & File Drawers

Salon Reception Desk 71-142 in Wide with Dual-Tone & LED Lighting for Salon

Retail Reception Desk 71-134 in Wide with Cable Management, Dual-Tone & File Drawers

Retail Reception Desk 16-157 in Wide with Dual-Tone & Lumbar Support for Retail

L-Shaped Reception Desk 31-197 in Wide with Dual-Tone, Keyboard Tray & File Drawers

Curved Reception Desk 31-118 in Wide with Dual-Tone, Keyboard Tray & File Drawers

Content Menu ● Understanding the Purpose and Function >> Identifying Key Requirements ● Considering the Reception Area >> Analyzing the Space >> Complementing the Overall Design ● Ergonomics and Functionality >> Optimizing the Workspace >> Prioritizing Comfort ● Materials...
Mar 23, 2025
Content Menu >> Planning Your DIY Reception Desk >>> Assessing Your Needs and Space >>> Setting a Budget >>> Selecting a Design Style >> Essential Tools and Materials >>> Essential Tools >>> Recommended Materials >> Safety Equipment and...
Mar 19, 2025
Content Menu >> Introduction to Reception Desks >> Key Considerations for Choosing a Reception Desk >>> Size and Layout >>> Shape and Design >>> Style and Material >>> Functionality >>> Budget >> Where to Buy Reception Desks >>> Online...
Mar 19, 2025