
My office
Your cart (0)
Your cart is ready for a fresh start.
Explore office furniture designed for focused, comfortable work.
Continue shoppingMy office
Explore office furniture designed for focused, comfortable work.
Continue shoppingContent Menu
● Planning Your Conference Table Project
>> Choosing the Table Shape and Style
● Selecting Materials and Tools
>> Materials
● Enhancing Functionality and Aesthetics
>> Cable Management and Power Integration
Creating a conference table is a rewarding woodworking project that combines design, craftsmanship, and functionality. Whether you want to build a custom table for your office or a collaborative workspace centerpiece, this comprehensive guide will walk you through the entire process—from planning and materials to construction and finishing touches. By the end, you will have a durable, attractive conference table tailored to your specific needs.

Before starting construction, carefully plan the table size based on the room and seating requirements. Measure the available space and allow at least 3 feet of clearance around the table for comfortable movement. The length of the table depends on how many people you want to seat. For example, a 6-foot table typically seats 6 people, while a 20-foot table can accommodate 20 or more.
Consider ergonomic spacing: each person needs approximately 24 to 30 inches of width and 12 to 18 inches of knee clearance. The table width usually ranges from 36 to 48 inches, allowing enough surface area for documents, laptops, and other meeting essentials.
Conference tables come in various shapes, including rectangular, boat-shaped (convex), oval, and round. Rectangular tables are the most common and efficient for seating many people. Boat-shaped tables offer a more elegant look and better sightlines for participants. The style should complement your office décor, whether modern, industrial, or traditional.
- Wood: Hardwoods such as oak, walnut, or maple are preferred for their durability and attractive grain. Engineered wood like plywood can be used for cost efficiency, especially for structural supports. Reclaimed wood adds character but may require more preparation.
- Metal: Steel angle irons or metal legs can reinforce the table and add an industrial aesthetic.
- Finishing supplies: Sandpaper (120 to 220 grit), wood glue, wood screws, and finishing oils, varnishes, or polyurethane for protection and sheen.
- Circular saw or table saw for cutting wood
- Jointer and planer to smooth and flatten boards
- Orbital sander for finishing
- Clamps to hold glued pieces together
- Drill and screwdriver for assembly
- Measuring tape, square, and pencil for precision
1. Prepare the Wood Planks
Select and prepare hardwood planks by jointing and planing them to ensure flat, even thickness and smooth edges.
2. Glue-Up Process
Arrange planks edge-to-edge in the desired order. Apply wood glue along the edges and clamp the boards tightly together. Let the glue cure for at least 24 hours to form a solid tabletop.
3. Reinforce the Underside
Attach plywood strips or hardwood battens perpendicular to the tabletop planks underneath. This reinforcement prevents warping and adds stability.
1. Leg Assembly
Use sturdy 4x4 hardwood posts or metal legs. For a hybrid design, combine wooden legs with steel angle irons for extra strength.
2. Apron Construction
Connect the legs with horizontal aprons made from 2x4 or 2x6 boards. Join these using mortise-and-tenon joints or pocket-hole screws for a strong frame.
3. Additional Support
Consider adding a middle brace or stretcher between legs for added rigidity, especially for longer tables.
1. Attach the Base to the Tabletop
Use metal flange fittings or wood screws to secure the tabletop to the base. Ensure the tabletop is centered and level.
2. Final Sanding and Finishing
Sand the entire table progressively from 120-grit to 220-grit for a smooth finish. Apply your chosen stain or finish, such as Danish oil or polyurethane, allowing sufficient drying time between coats.
Modern conference tables often include built-in cable management solutions. Drill holes with grommets for cables, or install power outlets and USB charging ports under the tabletop for convenience during meetings.
Add inlays, edge profiles, or contrasting wood strips to personalize the table's appearance. A boat-shaped or convex edge can make the table visually interesting and improve sightlines.
- Wipe spills immediately to prevent water damage or warping.
- Use coasters or felt pads under heavy objects to avoid scratches.
- Reapply finish every 2 to 3 years to maintain protection and appearance.
- Avoid placing the table in direct sunlight to prevent fading.
Q1: What type of wood is best for a conference table?
Hardwoods like oak, walnut, and maple are ideal due to their durability and attractive grain patterns.
Q2: How long does it take to build a conference table?
Depending on complexity and drying times for glue and finish, expect 3 to 7 days from start to finish.
Q3: Can I add power outlets to my conference table?
Yes, integrating power outlets and USB ports is common and can be done by wiring extension cords under the tabletop.
Q4: How do I prevent the table from warping?
Use proper reinforcement such as plywood battens underneath the tabletop and maintain consistent humidity levels.
Q5: What finish should I use for durability?
Oil-based polyurethane or Danish oil offers excellent protection and a beautiful finish for hardwood tables.

[1] https://gpfurnituremakers.com/design-conference-table/
[2] https://www.instructables.com/HomeMade-Modern-DIY-Conference-Table/
[3] https://gpfurnituremakers.com/wp-content/uploads/2018/06/Conference_Table_Assembly_Guide__2_.pdf
[4] https://www.simplifiedbuilding.com/projects/diy-industrial-conference-table
[5] https://kaguyasu.com/blogs/blog/how-to-build-a-wooden-conference-table
[6] http://nlp.nju.edu.cn/kep/UNsThMD_LunwenXiezuoGuifan(YuyanxueFanyixueCidianxueFangxiang).pdf
[7] https://www.finewoodworking.com/forum/conference-table-plans
[8] https://www.gemu.cn/static/uploads/editor/files/20200511/1589177189554633.pdf
Hot Tags: China, Global, OEM, private label, manufacturers, factory, suppliers, manufacturing company

Leather Executive Office Chair with Genuine Leather, Solid Wood & Lumbar Support

Mesh Ergonomic Office Chair with Breathable Mesh & Lumbar Support for Executive Office
Bookcase Storage Cabinet 71 in Tall for Home Office
Curved Reception Desk 47-94 in Wide with Keyboard Tray, File Drawers & LED Lighting
Curved Reception Desk 63-142 in Wide with Keyboard Tray, File Drawers & Fluted Front
Curved Reception Desk 47-150 in Wide with LED Lighting, Keyboard Tray & File Drawers

Ergonomic Office Chair with Swivel, Curved & Dual-Tone for Home Office

Modern Executive Desk 25-110 in Wide with Side Storage for Home Office
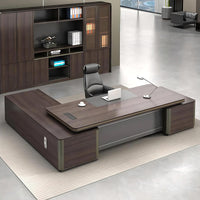
Modern Executive Desk 22-126 in Wide with Curved & Cable Management for Home Office
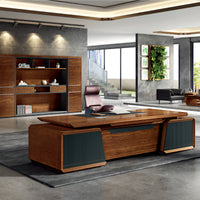
Modern Executive Desk 28-142 in Wide with Walnut for Home Office

Content Menu ● Understanding the Importance of Cable Management >> Benefits of Proper Cable Management ● Planning Your Cable Run >> Assessing Your Conference Table Setup >> Measuring and Mapping ● Tools and Materials Needed ● Step-by-Step...
Jun 03, 2025
Content Menu ● Understanding the Importance of Conference Table Size >> Why Size Matters ● Key Factors to Consider When Choosing Conference Table Size >> Room Dimensions >> Number of Seats >> Table Shape and Its...
Jun 03, 2025
Content Menu ● Understanding Small Conference Tables >> What Defines a Small Conference Table? >> Typical Dimensions of Small Conference Tables >> Seating Capacity and Space Requirements ● Shapes and Styles of Small Conference Tables...
Jun 02, 2025